仿生学应用:电子蝌蚪(二)
本文中,我们继续讲解,怎么让蝌蚪军团,一个个的逼真的动起来的。
前面简单介绍了小蝌蚪这个类的基本变量,及蝌蚪实例化及绘制出来的方法,实现了基本绘制的功能。动起来实际很简单,无非就是每次执行run的时候,给当前蝌蚪实例移动到一个新的位置,然后重绘即可。那么问题是,这个新的位置,我们该如何确定。
最简单粗暴的方式,就是随便去一个随机向量,用该向量,去更新实例坐标。
updateVector () {
this.vector = paper.Point.random()
}
updatePosition () {
const newP = this.position.add(this.vector)
this.position = newP.clone()
}
moveHead () {
this.head.position = this.position
}
run (boids: Array<Boid>) {
// this.flock(boids)
this.updateVector()
this.updatePosition()
this.moveHead()
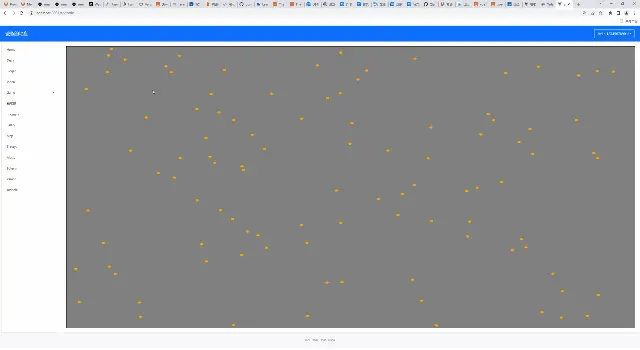
}通过paper.Point.random()这个api,我们能够获取到一个坐标值在0-1之间的随机点。该点的坐标值随机、角度长度均随机。用改随机值,去更新蝌蚪坐标,效果如下:
但是这显然不是我们想要的,因为每一个点的运动,似乎都朝向了一个方向,显得很僵硬。原因在于,生成的随机值当然是不一样的,只是这个向量值够小,同时我们更新的时候,只是单纯的add相加的方式,导致了上述的结果。太low。我们想尽可能的,让蝌蚪的运动,逼真化。随机向量的值范围在0-1,我们给个[-1, 1]同时加大幅度10倍,效果如何呢?
updateVector () {
  // this.vector = this.acceleration
  this.vector = paper.Point.random().multiply(2).subtract(new paper.Point(1, 1))
  console.log('this.vector>>', this.vector)
}

updatePosition () {
  const newP = this.position.add(this.vector.multiply(10))
  this.position = newP.clone()
}
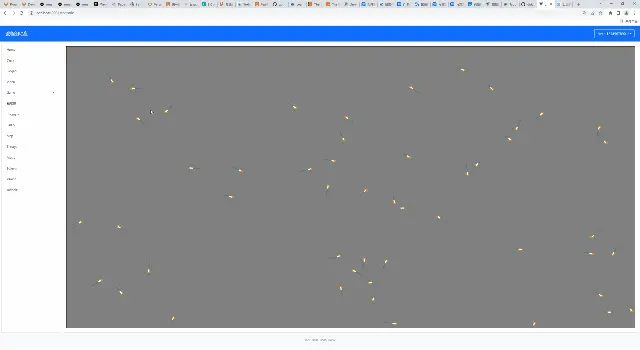
果然是活力倍增了很多,但总感觉有些不对劲。他们似乎总是在一块区域固定运动,说白了因为是随机值所以方向不固定。这里涉及到了方向和步数的拆分问题。
// 初始化阶段固定方向和步数
    // 方向
    this.vector = paper.Point.random().multiply(2).subtract(new paper.Point(1, 1))
    // 步数
    this.acceleration = paper.Point.random().multiply(2)

  updatePosition () {
    const newP = this.position.add(this.vector.add(this.acceleration))
    this.position = newP.clone()
  }
初始化的时候,就把方向和不长固定写死,这样对于每一个蝌蚪而言,他们拥有各自的运动方向和运动速度。然后每次更新时,用这两个值去更新实例的位置即可。效果如下:
效果不错。但是运行了一会发现个问题,小蝌蚪都没了….原因很简单,视图区域的大小是确定了。但是画布空间的大小,理论上是无限的。为此,我们需要加一个简单的边缘重置。怎么实现?很简单,坐标取反。
updatePosition () {
  const newP = this.position.add(this.vector.add(this.acceleration))
  if (newP.x >= this.canvasWH.width) {
    newP.x = 0
  } else if (newP.x < 0) {
    newP.x = this.canvasWH.width
  }
  if (newP.y <= 0) {
    newP.y = this.canvasWH.heigth
  } else if (newP.y > this.canvasWH.heigth) {
    newP.y = 0
  }

  this.position = newP.clone()
}
效果如下:
完美实现了我们的需求。一旦越界,自动归位。
完成了基本逻辑后,回首我们的任务:“电子蝌蚪”。为了让他像个蝌蚪,我们需要把之前隐藏的颈部和尾巴释放出来。
this.path = new paper.Path({
  strokeColor: 'green',
  strokWidth: 2,
  strokeCap: 'round'
})
for (let i = 0; i < this.neckAmount; i++) {
  this.path.add(new paper.Point(0))
}
this.shortPath = new paper.Path({
  strokeColor: 'white',
  strokWidth: 4,
  strokeCap: 'round'
})
for (let i = 0; i < this.tailAmount; i++) {
  this.shortPath.add(new paper.Point(0))
}
颈部是长3宽4的直线,尾巴设计为长10宽2且round头部的直接。
每次触发run函数改变蝌蚪位置后,还需要重绘其颈部和尾巴:
createBoid () {
...
...
    this.path = new paper.Path({
      strokeColor: 'green',
      strokWidth: 2,
      strokeCap: 'round'
    })
    for (let i = 0; i < this.tailAmount; i++) {
      this.path.add(new paper.Point(0, 0))
    }
    this.shortPath = new paper.Path({
      strokeColor: 'white',
      strokeWidth: 5,
      strokeCap: 'round'
      // selected: true
    })
    for (let i = 0; i < this.neckAmount; i++) {
      this.shortPath.add(new paper.Point(0, 0))
    }
  }

...
...
 updateNeckAndTail () {
    const segmentsNeck: Array<paper.Segment> = this.shortPath.segments
    const segmentsTail: Array<paper.Segment> = this.path.segments
    segmentsNeck[0].point = this.position.clone()
    segmentsTail[0].point = this.position.clone()
    for (let i = 1; i < this.neckAmount; i++) {
      const curP = this.position.subtract(this.vector.normalize(1).multiply(i * 5))
      segmentsNeck[i].point = curP
    }
    for (let i = 1; i < this.tailAmount; i++) {
      const curP = this.position.subtract(this.vector.normalize(1).multiply(i * 5))
      segmentsTail[i].point = curP
    }
    // this.shortPath.smooth()
  }
创建蝌蚪时,以path的实例作为颈部和尾巴,并埋上几个点坑。效果如下:
额…蝌蚪的颈部和尾巴有是有了,动也确实是动起来了,但是吧,跟“逼真”相去甚远。接下来,我们就需要充分的运用上帝公式(线性代数的知识)的力量,赋予他们活力